One of the topics we always discuss in-depth during a workshop is what is the best camera mode to shoot in?
These modes include:
- Shutter Priority\Time Value
- Aperture Priority
- Manual
My answer is always the same. It depends on the scene, the desired effect you want to achieve, and the environment.
When you are with the pros and cons of each of the modes, and can select the proper mode for the situation, you will achieve photographs that are:
- Exposed perfectly
- Tack sharp
- Creative
- Attain a higher keeper ratio
Shutter Priority / Time Value
The Shutter priority mode locks the shutter speed, and automatically adjusts the aperture value to achieve the exposure. By default the camera exposes the scene to 18% gray, or middle gray. If you require a different exposure than 18% gray (for example, a snowy scene) you will need to use the exposure compensation feature to brighten the scene up in order not to have gray snow.
Pros of Shutter Priority
- Changing light conditions. When the light changes, the exposure will automatically change.
- Showing motion. This is a great mode to show a very little motion blur. For example, if I want to photograph a blurry snowfall, I would set my shutter value at 1/15th to 1/60th of a second, and let the camera adjust the aperture as the light and scene change.
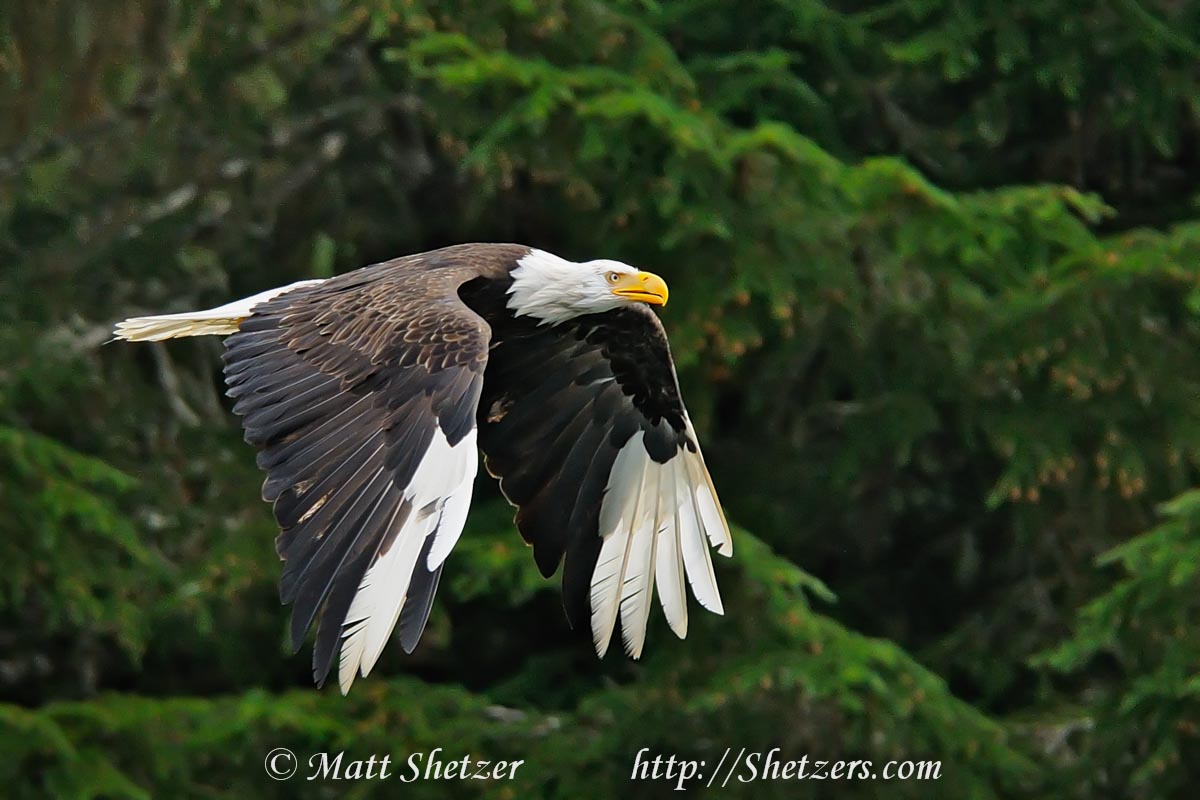
- Freezing motion. For example, when I want to freeze an eagles wings in flight, I will set the shutter to 1/1600 per second, and let the camera adjust the aperture.
Cons of Shutter Priority
- It doesn’t work well with changing brightness of scene while panning. Since Shutter Priority automatically adjusts the exposure to the scene, as you move the camera, the exposure will adjust per the scene. For example, if I am following a Bald Eagle, and the background changes as the eagle flies by, the exposure will change, leaving the eagle exposed incorrectly.
- Change in composition can affect exposure.
- Zooming in or out will change exposure as scene is changed.
- Landscape or portrait orientation will change exposure as the scene is changed.
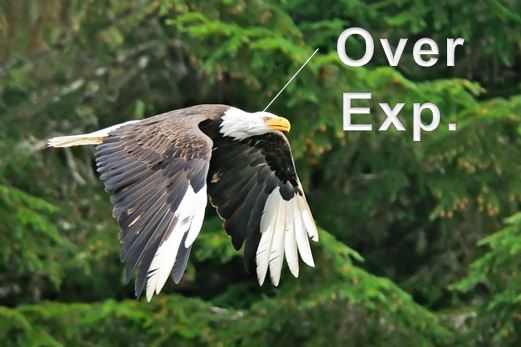
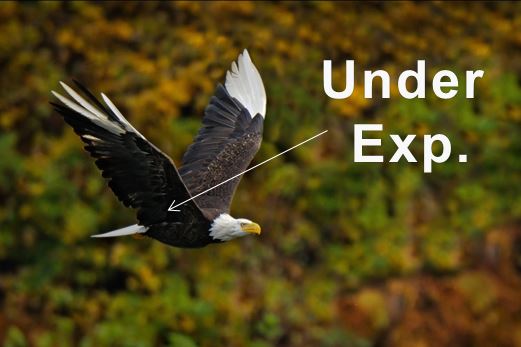
The example images below were taken 2 seconds apart. When using the auto modes like Shutter Priority and Aperture Priority, the camera will adjust exposure as the background goes from dark to light, therefore overexposing the subject in the left image, and underexposing the subject in the right image. If the exposure was locked, or shot in manual mode, this would not been an issue.

Due to the dark background, the camera will try to make the scene middle gray, therefore overexposing the scene, thus losing detail in the bald eagle’s head.

Due to the lighter background, the camera in an automatic mode will darken the scene, therefore you will lose detail in the shadows.
Aperture Priority Mode
This automatic mode will lock the Aperture, which controls the depth of field of an image, and the camera will adjust the shutter speed to achieve an 18% gray exposure. If you require a different exposure than 18% gray you will need to use the exposure compensation feature.
Pros
- Good in low light for action. Set at camera at the lowest aperture acceptable, and let the camera adjust the shutter speed. Since you are at the lowest aperture, all extra light will be applied to the shutter speed.
- Set Depth of Field. When DOF is your priority, for example a portrait with a nice soft background, set your aperture and let the camera adjust the shutter speed.
- Good in changing light conditions. As the light changes, for example on a partly cloudy day, the camera will adjust to maintain that middle tone, 18% gray exposure.
Cons (same as the other auto mode of Shutter Priority)
- Not good with changing brightness of scene while panning. Since Aperture Priority automatically adjusts to the scene, as you move the camera, the exposure will adjust.
- Change in composition can affect exposure.
- Zooming in or out will change exposure as the scene is changed.
- Landscape or portrait orientation will change exposure.
Manual Mode
In this mode you are adjusting both the Aperture and the Shutter to achieve your exposure. The camera will not alter these due to the scene changing, or the light changing. You are in control of your camera!
Pros
- Subject is exposed correctly. As the scene changes, the camera is not changing the exposure, therefore your subject is exposed correctly as long as it stays in the same light.
- Best for panning and changing backgrounds and steady ambient light on subject.
- Exposure still correct when changing composition from landscape to portrait and zooming in and out.
Cons
- Changing light. On a partly cloudy day, it can be real tough to keep up with the changes because the camera is not adjusting automatically
- A little slower to get used to. You are in control of your camera, and therefore need to make the adjustments. When you first start shooting manual, it takes a little longer to setup.
- Must have object to meter. Rock, snow, etc. You need to know the proper exposure of the scene. For example, I know that my camera captures snow at +2 stops of light from 18% gray, therefore I find some snow, spot meter then snow and adjust my Shutter or Aperture to shoot +2 on my meter. That is it!!! I’m all set now as long as the light doesn’t change.
- Changing ambient light on subject. When the light changes, you need to make the change.
Wrap up
Each of the modes has its purpose and by being able to identify the correct scenario for each will improve your photography and image quality.
Play with each and have some fun with it!!
Join us for one of our workshops where we discuss this in great detail, practice in different settings, and have open discussions on the topic.

