

COMPOSITION (PART 2)
Let’s continue our discussion on composition. In the last chapter, we covered the Rule of Thirds, the Rule of Odds, and how to choose a background. The techniques in this chapter will give you even more tools to take well composed photographs.
LESSON 5: INTERNAL FRAMING
Framing is another way to draw the viewer’s eye toward certain elements of your photograph. Every photo is automatically framed by the limits of the camera, but by including smaller frames within the photo, you can subtly direct the viewer’s attention.
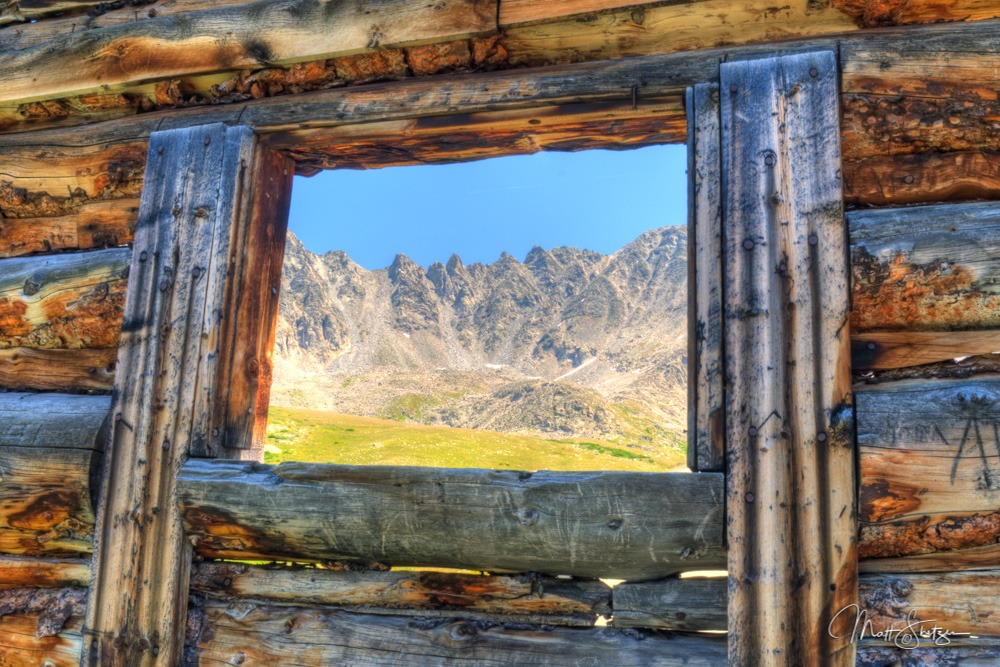
An old cabin near my home in Colorado provides an excellent example of internal framing.
The Technical Details: Focal Length 18mm, Shutter Speed 1/8sec, Aperture f/18, ISO 200, Exposure Program Mode
This image uses the cabin window to focus your attention on the mountain scenery outside. I could have left the cabin and taken a picture with nothing between me and the mountains, but then the mountains would have no context. Your attention would skip around to different points, and the natural beauty would leave less of an impression.
Study how the frame provides context that helps tell the story of this photo. Knowing that the photographer is inside a cabin, you’re invited to imagine what’s behind them: is it a fully stocked chalet, or an abandoned ruin? If it’s abandoned, is it possible that the old pioneers who built it looked out on the exact scene you’re witnessing now?
Windows, doors, arches, hallways, and other bounded spaces provide the easiest ways to frame a subject. They draw the viewer’s eye to a smaller space within your photo. However, you can get this result other ways.
Try using elements of the image to frame the subject, as in the photo below. This is especially useful in nature photography, where you’ll almost never have a convenient door or window to shoot through. Instead, find open spaces of sky, water, or foliage, framed by large objects such as trees or rocks.
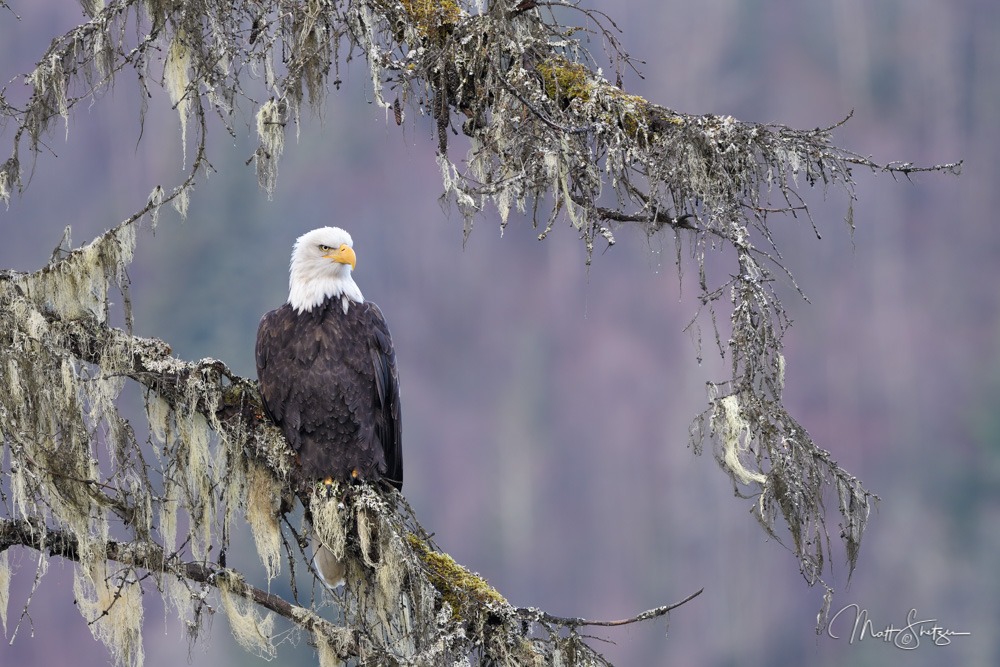
In this photo, the mossy tree branches form a natural “window” around the bald eagle. A shallow depth of field softens the background to heighten the effect.
The Technical Details: Focal Length 600mm, Shutter Speed 1/60sec, Aperture f/8, ISO 400, Exposure Program Manual Mode
In the last chapter, we discussed how moving small distances can have a huge impact on your background. The photo below illustrates how that technique can help with framing. Searching for a way to frame a bald eagle, I discovered that the full moon was the perfect size.
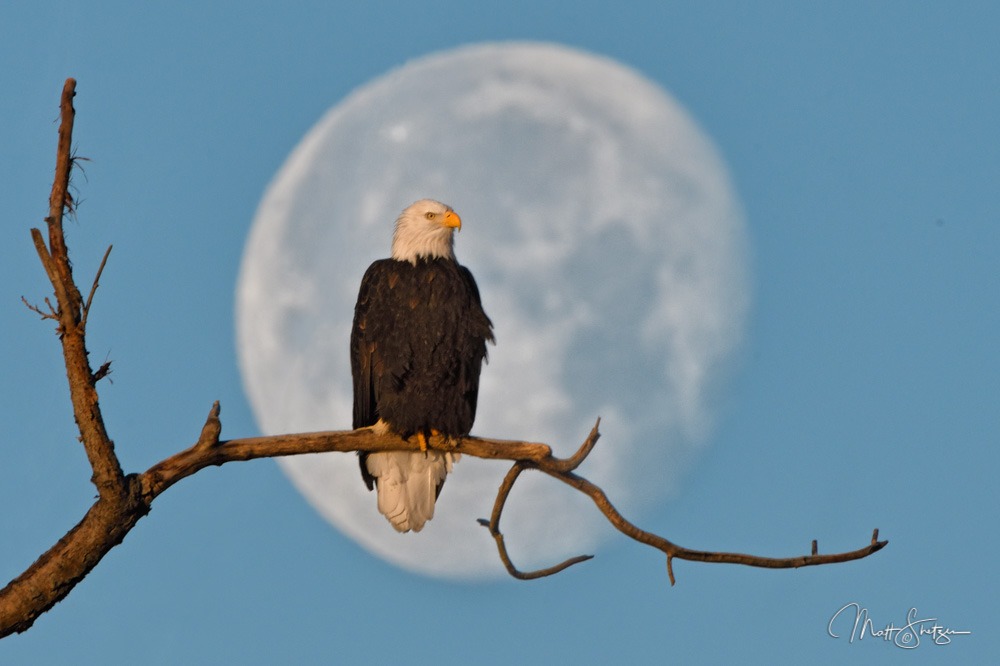
By moving just a few inches, I was able to frame the bald eagle inside the “Super Moon.”
The Technical Details: Focal Length 850mm, Shutter Speed 1/250sec, Aperture f/22, ISO400, Exposure Program Aperture Priority Mode
Quick Tip
Direct the viewer’s eye to certain objects by creating smaller “frames” inside the overall frame of your photograph.
LESSON 6: TEXTURES
Nothing in real life is perfectly smooth or solid. Even a man-made, painted wall turns out to have bumps and valleys all over the place when you get close. As the light gets lower, these textures are emphasized.
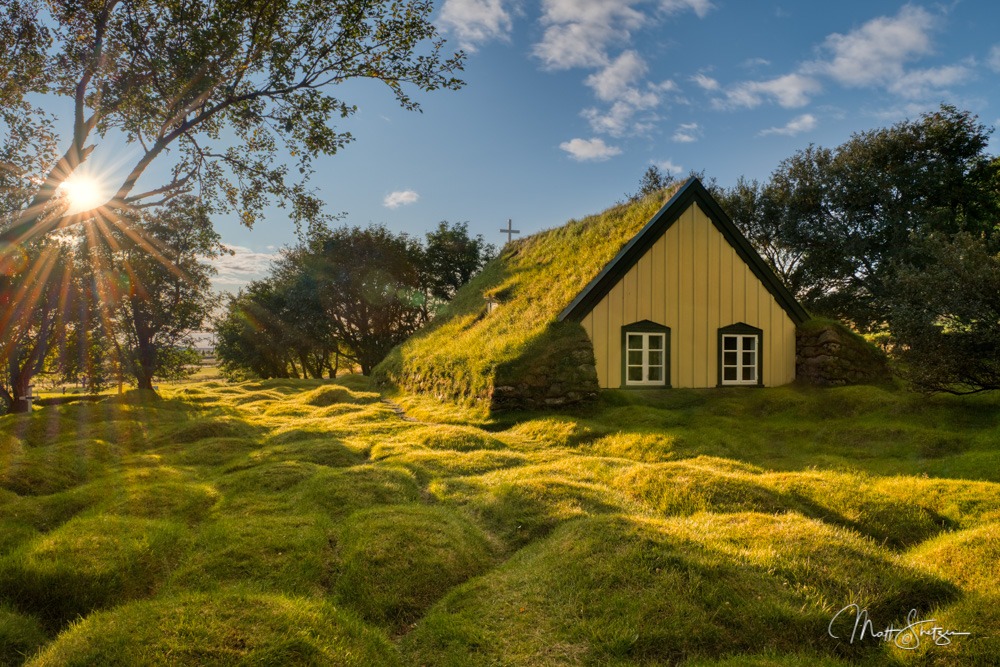
The textures on the graves and grass give this image a feeling of depth.
The Technical Details: Focal Length 26mm, Shutter Speed 1/160sec, Aperture f/20, ISO 400, Exposure Program Aperture Priority Mode
In photography, texture refers to the appearance of surfaces in a photo. As photographers, we’re attempting to capture real life, so we want to portray the world in all its rough, uneven glory. Even when photographing the flat side of a building, or the mirror-like surface of calm water, you should demonstrate the real-life qualities of those surfaces.
Your camera settings influence how your photos will portray texture. If you set your aperture too wide, you won’t catch enough definition from each surface to capture its details.

The clouds provide the needed texture in this image. If the exposure was too long or short, or there was not enough depth of field, the image would lose the textured feeling of the real-life view.
The Technical Details: Focal Length 24mm, Shutter Speed 1/3sec, Aperture f/16, ISO 200, Exposure Program Aperture Priority Mode
Color balance also impacts texture. Remember that texture is most visible through light and shadow. Changing the quality of the light can significantly impact the texture of your photo and the mood it conveys. Experiment with the settings and see what results you get!
Quick Tip
In the best photographs, you can clearly perceive the textures of objects.
LESSON 7: LEADING LINES
By this point, you’ve probably noticed a pattern in all the composition tricks I’ve been teaching you.
Everything in this chapter is about controlling the viewer’s attention in order to produce a desired response. Photographers are like magicians: we play with perception.

Notice how the lines on the leaf converge on the frog in the center, bringing your eyes directly to the frog to really emphasize the subject.
The Technical Details: Focal Length 200mm, Shutter Speed 1/30sec, Aperture f/16, ISO 1000, Exposure Program Aperture Priority Mode
Leading lines are another way to get viewers of your photo to look where you want them to look. If you compose your photograph with obvious lines, your viewer’s eyes will follow those lines, beginning with the frame and moving toward the center.
Let’s look at another example. Try to spot the leading line in this next picture.

Your eyes follow the curve of the leaf toward the subject. Notice how the background is out of focus, making the hummingbird stand out.
The Technical Details: Focal Length 300mm, Shutter Speed 1/320sec, Aperture f/8, ISO 1600, Exposure Program Aperture Priority Mode
Again, a leaf serves as our leading line, drawing the eye along a graceful curve toward the bird — the hero of this photo’s story.
Leading lines work best when they incorporate perspective. Seen far away, the side of a mountain isn’t a great leading line, because it’s all in the background. A mountain ridge that starts under your feet and runs into the distance guides the eye much more effectively.
The best leading lines are long objects moving across the frame. In nature, look for paths, rivers, beaches, and tree trunks. In more built-up environments, try roads, bridges, fences, or the sides of buildings.
Quick Tip
Control your viewer’s attention by including lines that start in the foreground and move toward the background.
LESSON 8: SIMPLIFYING, CROPPING, AND AVOIDING DISTRACTIONS
Now that you’re pretty far into this chapter, what strikes you about this photograph?
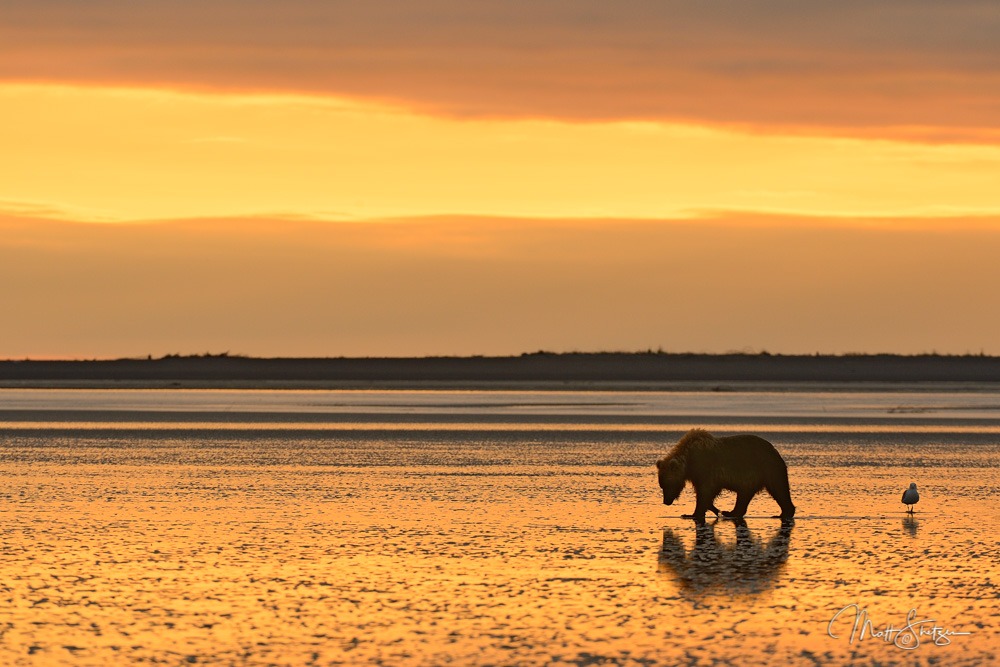
Simplicity: Sunrise at Lake Clark National Park and Preserve.
The Technical Details: Focal Length 380mm, Shutter Speed 1/640sec, Aperture f/7.1, ISO 500, Exposure Program Aperture Priority Mode
You could say that the photo follows the Rule of Thirds, and you’d be correct. The bear is placed such that viewers will perceive it as more balanced. You could also say that a picture of just one bear follows the Rule of Odds.
Yet either one of those answers overthinks the picture just a little. To me, it works because of one thing: simplicity.
Remove clutter from your image whenever you can. That’s a crucial (and often overlooked) facet of composition. Often, the easiest way to make your photo look good is to remove as many distractions as possible.
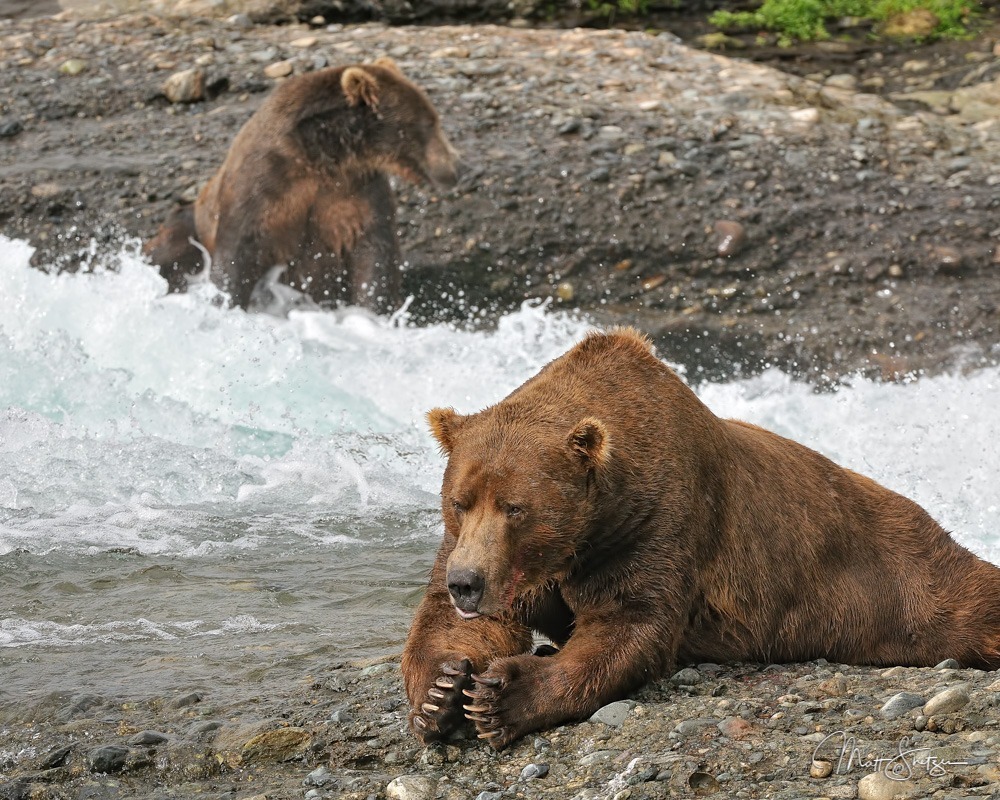
Here’s another Alaskan grizzly bear photo. Notice how the bears in the back don’t add anything to the story. For a better-composed shot, I should have waited to catch one alone, or moved to take the photograph from a different angle.
The bears in the background distract the viewer without adding anything to the image.
The Technical Details: Focal Length 600mm, Shutter Speed 1/320sec, Aperture f/6.7, ISO 500, Exposure Program Manual Mode
You can also remove distractions in post-production. The photo below included a lot more content on the sides, until I realized that the scuffle between two hummingbirds was the most interesting part. By cropping the picture, I removed all the information that didn’t contribute to that story.
With that said, make sure you don’t compose your images so tight that you cut off wings and other points of interest. A little extra room in composition helps when you process your images, especially you’re not yet sure what ratio to use (8×10, 3×2, etc.).

Booted racket-tail hummingbirds battle over the nectar of a flower. Zooming out a bit gave me a better chance of capturing all the action.
The Technical Details: Focal Length 300mm, Shutter Speed 1/4000sec, Aperture f/20, ISO 500, Exposure Program Manual Mode
Quick Tip
Good composition is clean and draws attention to the subject. The best photographs avoid clutter.
LESSON 9: EYE CONTACT
To take striking, memorable photographs of both humans and animals, remember one easy rule: eye contact.
Whenever a thinking species communicates, its eyes play a staggeringly large role. Studies have shown that it’s many times harder to understand somebody when you can’t see their eyes.
Getting eye contact can take some work. For example, to take this picture of a fox, I had to get down on the ground so I was at its level.
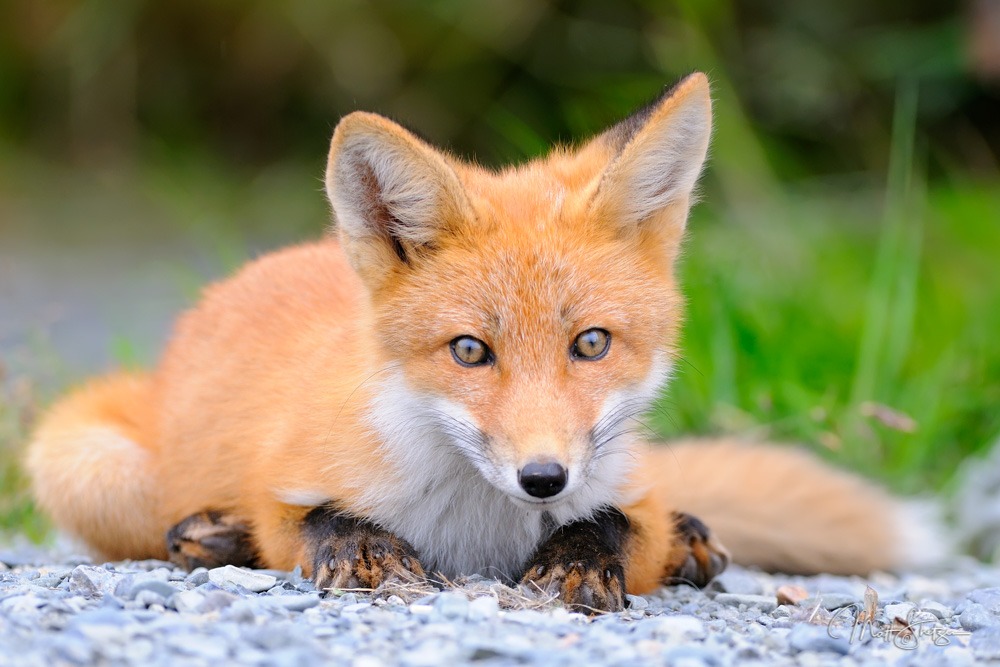
I laid on my belly to take this image. Getting low placed my camera at the fox’s eye level, creating an interaction between us.
The Technical Details: Focal Length 270mm, Shutter Speed 1/320sec, Aperture f/4, ISO 400, Exposure Program Manual Mode
Now, you can’t tell an animal to “say cheese” like you can with a human. That’s when your A-number-1 most important photography skill comes into play: patience.

It’s all about the eye contact. Notice the little white spots in the capuchin monkey’s eyes. These are called catch-lights, and help provide a window into the animal’s soul.
The Technical Details: Focal Length 390mm, Shutter Speed 1/400sec, Aperture f/6.3, ISO 1000, Exposure Program Aperture Priority Mode
Animals are never going to pose for you, but if you learn to watch and wait, you’ll find that many of them enter the perfect poses without thinking about it.
This would have been a better photo if I’d been able to get to eye level with this enormous brown bear. At the current angle, it doesn’t have the proper sense of engagement with the subject.
The Technical Details: Focal Length 340mm, Shutter Speed 1/1000sec, Aperture f/8, ISO 640, Exposure Program Aperture Priority Mode
Quick Tip
Eye contact improves any photo with a human or animal subject.
Patience is the most important skill any photographer must learn.
LESSON 10: BREAKING THE RULES
For the last lesson on composition, I’m going to pull the rug out from under you. All of the rules I’ve described in the last lessons were made to be broken.
A quote sometimes attributed to Pablo Picasso goes like this: “Learn the rules like a pro, so you can break them like an artist.”
Whether or not Picasso said that, his career illustrates it. Before he invented Cubism, Picasso’s early paintings were conventional. Same goes for Herman Melville’s first novel, Frank Lloyd Wright’s first building, and the first several Beatles albums.
Composition in photography is exactly the same. Once you’ve learned the above rules by heart, it’s time to start breaking them.
Let’s look at some more examples to illustrate the point. Inspect the photo below, and see if you can name two rules of composition that it breaks.
This photo breaks the rules, but does it still work?
The Technical Details: Focal Length 850mm, Shutter Speed 1/200sec, Aperture f/11, ISO 640, Exposure Program Manual Mode
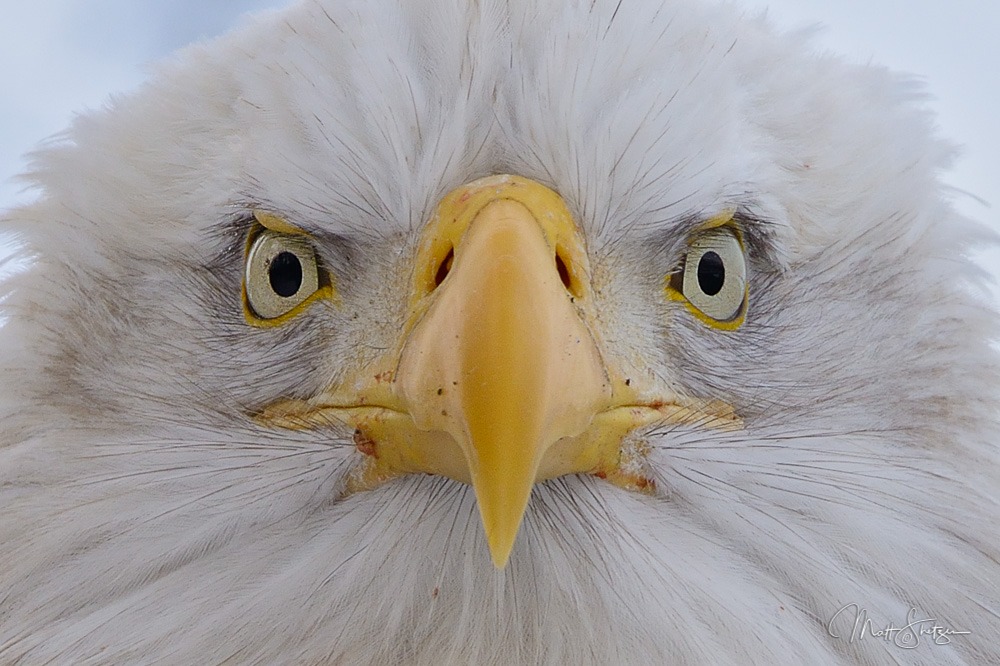
This image breaks the Rule of Thirds. All the important content is right in the center of the frame. There’s no attempt to achieve that pleasant asymmetry we learned about in Lesson 2.
It also lacks a background. There’s no context for this image, and the only framing is the photo frame itself.
Yet even though it breaks both these rules, I still think this photograph works (and I’m not just saying that because I took it!).
The photo breaks the rules in order to highlight intense eye contact with the bald eagle. This helps tell a story. Gazing into the eagle’s eyes, the viewer starts to think about its incredibly powerful vision, and what it must be like to see the world that way. At the same time, they’re getting a window into the eagle’s soul — an uncommonly intimate moment with a wild animal.
The texture of the eagle’s feathers is also clearly conveyed. None of that would have been possible if I had composed the photo in a more traditional way, setting the eagle against a balanced background.
Let’s try another. This picture is another example of breaking the rules of composition. Again, try and name the rules being broken here.
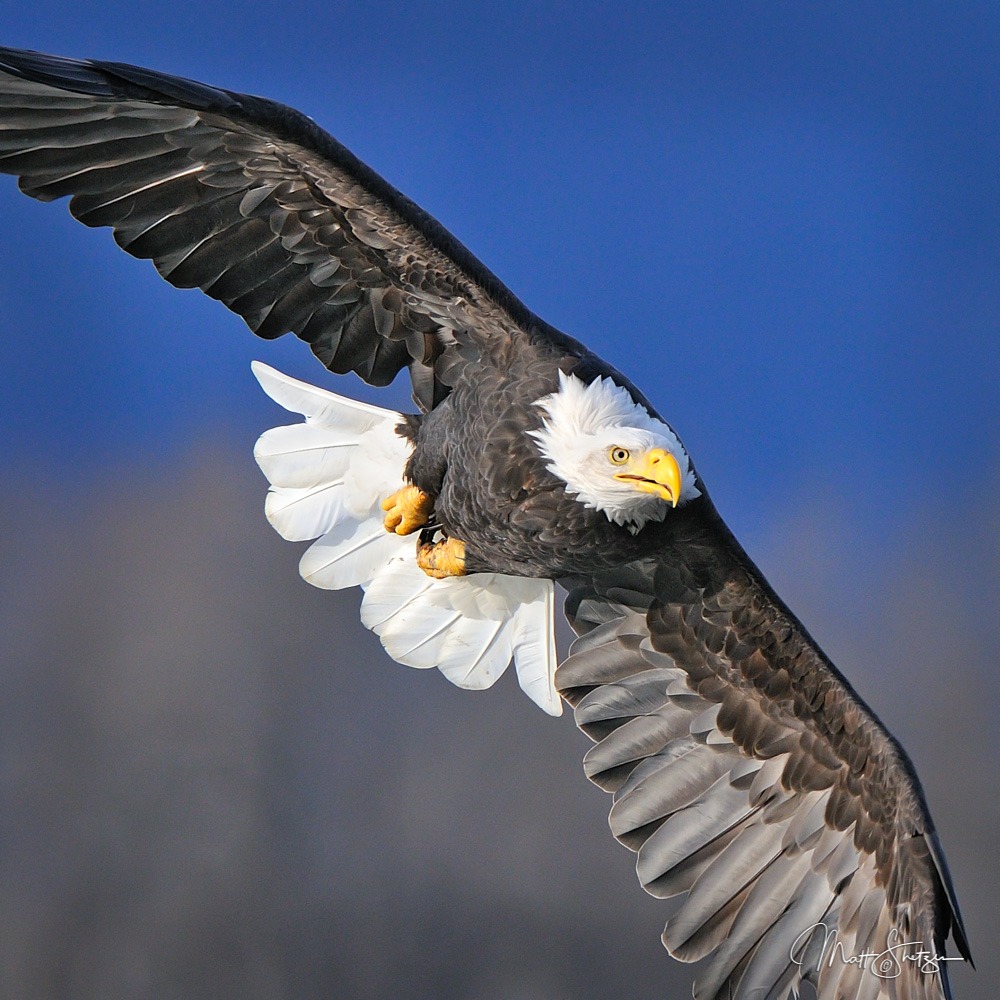
Breaking the rules. Notice the subject is cut off, looking out of the frame, but it still works.
The Technical Details: Focal Length 500mm, Shutter Speed 1/1250sec, Aperture f/5.6, ISO 500, Exposure Program Manual Mode
Once again, the Rule of Thirds is broken. The important content, the eagle’s face, is in the direct center of the frame.
Also like before, the background is heavily out of focus, removing framing and context.
The photo’s leading lines don’t all lead to the eagle’s face. One of its wings does, but the other wing draws the eye away.
I intentionally cropped the photo in order to break these rules. It results in a classically unbalanced photo, but to me, it also highlights the unique shape of the subject. We’re being told a story about the eagle’s flight, its wings, its behavior, its whole life.
The bottom line is that any piece of art has guidelines, not rules.
There’s no rule of photography so hard and fast that you can’t break it and still take a good picture. Back in Lesson 1, we learned that some photographers intentionally set their shutter speeds too slow in order to create a blurring effect. That’s just one example of what you can do by breaking the rules.
Quick Tip
The rules of composition aren’t immutable laws. Once you’re comfortable with them, start to get comfortable with breaking them.
If everyone followed all the rules, photography would get very boring. Everyone’s images would look exactly the same.
ASSIGNMENTS
Now it’s time to get out there and play with the topics we have discussed.
For each compositional example in this chapter, try to create 3 unique images using that technique. Then create one image that breaks each rule for a specific purpose.
Don’t forget to get critique from other photographers on your photos, and most importantly: have fun!
Want More?
Once you have finished, you might be craving more chances to test your skills. During our photography workshops, we go in-depth and teach our guests advanced techniques in the world's most beautiful locations, like Alaska, Costa Rica, Iceland, Colorado and Ecuador.
Each workshop has different topics and skill sets that are dedicated to the subjects at each spectacular location.
Learn more about our Photo Workshops at: https://www.shetzers.com/photo-tours/